Baton Rouge UR 21-S and Hafanana
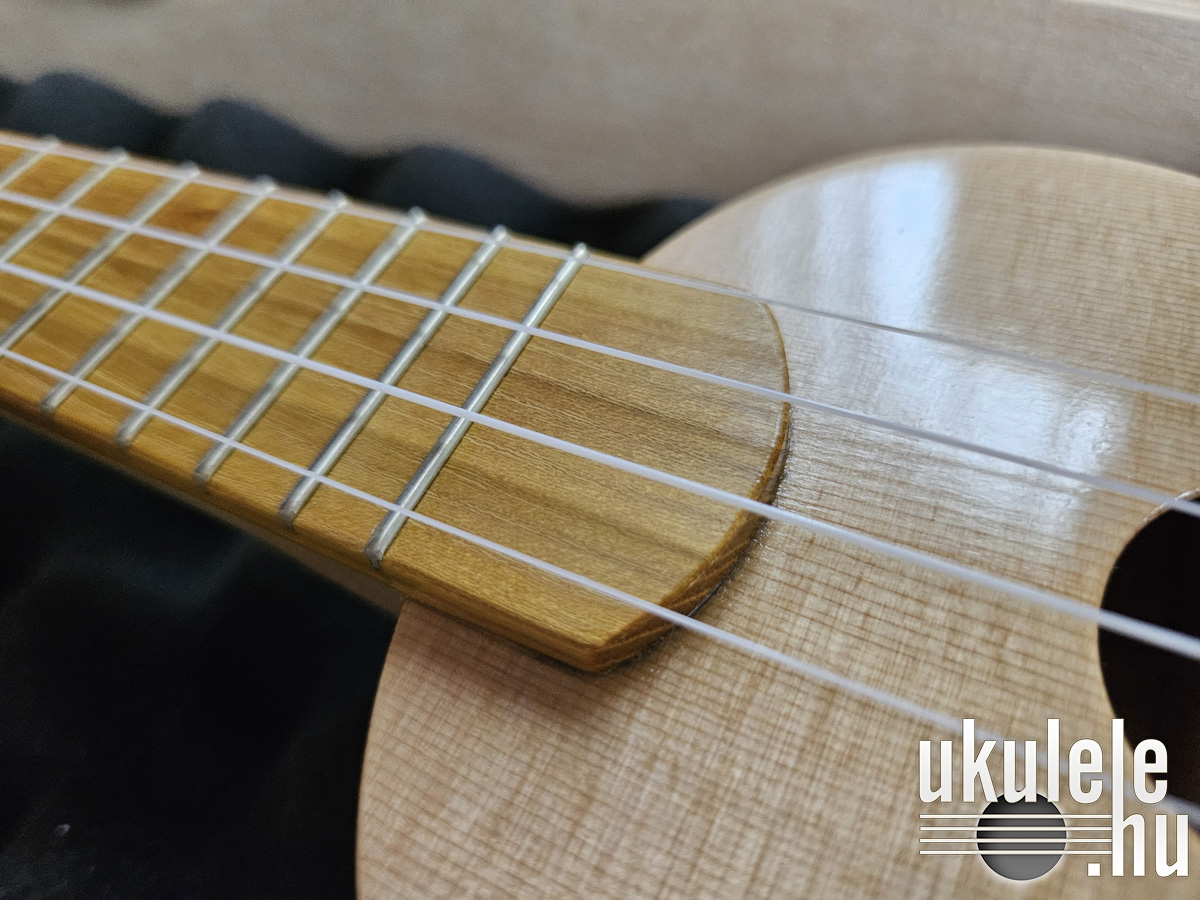
Our latest instrument review also comes with a song arrangement – more precisely, we are going to learn the chords to a slightly more difficult song. First, the ukulele itself: I accompany Hafanana on a Baton Rouge UR 21-S soprano ukulele.
This ukulele is also very pleasant to play and does not differ greatly from its sibling, the Baton Rouge V2-S Sun. The main difference is appearance – the decoration – while the substance, meaning the playing experience and sound, is essentially the same. From that point on, the choice is simply a matter of personal taste. I prefer the UR 21-S because of the concentric circles around the sound hole and the decorative strip running around the edge of the instrument, but if you prefer the sunburst pattern, feel free to choose the V2-S Sun because the sound is effectively identical.
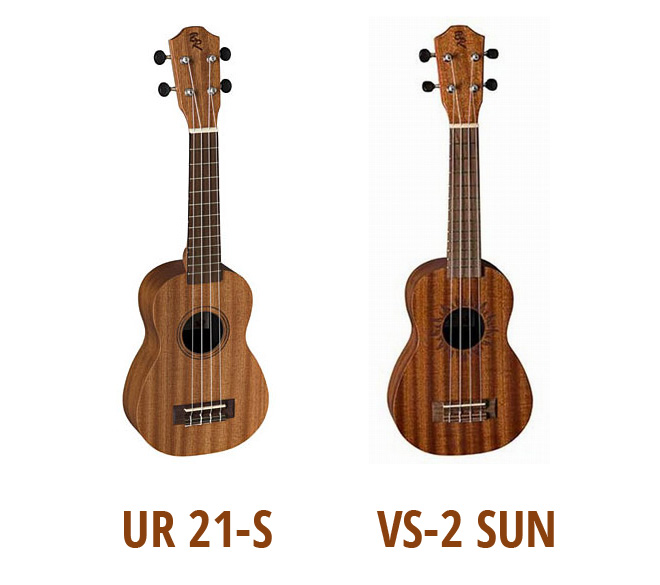
I became very fond of both little soprano ukuleles and spent several enjoyable weeks with them. The Aquila Nylgut strings on the all-mahogany bodies produce the expected slightly chirpy – yet unmistakable – sound, making it easy to recognise a soprano ukulele. (All right, it is not always so easy to distinguish it from a concert ukulele .) Following foreign ukulele websites and Facebook groups, I regularly see the question of which ukulele size is the “real” or authentic one. We will probably never know the definitive answer and it will remain an eternal debate among ukulele players. If I had to choose, I would vote for the soprano, simply because its sound is so characteristic.
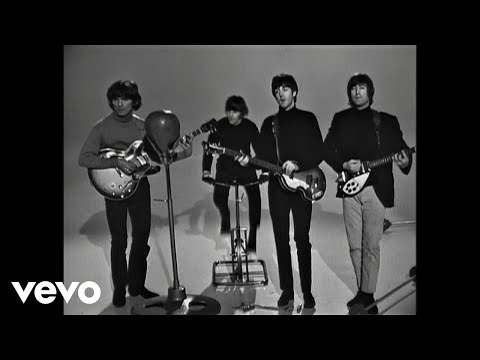
And that is exactly the sound heard almost throughout Afric Simone's 1975 hit Hafanana. In fact, the ukulele is the first instrument you hear beneath the extraordinarily complicated la-la-la section at the beginning. The song has been covered by countless artists, because with a little polishing, an enormous drum sound and some extra bass, it can be transformed into a brutal disco track that fits modern tastes perfectly. I am sticking with the original and will show you an arrangement of that version – more precisely, its ukulele accompaniment. One thought about the song before the video: the first time I heard it, I did not quite know what to make of it because the chord progression is so distinctive and inventive. I could not decide whether it was excessively sweet or whether that very sweetness made it so special compared with other songs of the 1970s. After listening to it several more times and trying to pay attention to every detail, I realised that it is a little gem. The chord progression really is unique. The A and B sections use the same chords in a different order; then there are the incomprehensible and almost impossible-to-remember lyrics, whose meaning may never be revealed, while the bass guitar line is absolutely wonderful. The vocal melody is catchy. An acoustic guitar complements the ukulele in the accompaniment. Overall, I think it is an imaginative and genuinely good song. I am happy whenever it comes up in a playlist and never skip it. For us ukulele players it is also a real treat, because playing all the chords from beginning to end is quite a workout!
Just as the chord progression in the blog post about Five Foot Twois more suitable for players who are already on friendly terms with chords, I would recommend Hafanana mainly to intermediate and advanced players. That obviously does not mean beginners cannot try it, but I would not start your ukulele studies with this song unless you want to lose your enthusiasm for learning chords , because the accompaniment is full of barre chords. Beginners should nevertheless understand barre chords at least in theory and keep the ability to play them as a future goal. Not specifically because of Hafanana: in almost any song you can suddenly run into one or two barre chords, and it is not very impressive to tell the family that you can accompany only half a verse because your knowledge ends when F# major appears.
The essence of a barre is that, preferably with the index finger, we press all four strings down at once and use the other fingers for the remaining notes of the chord. This takes considerable effort and engages practically all the muscles of the forearm. You have to practise and build strength until your hand gets used to the movement. At first it is very uncomfortable, and after about a minute of playing barre chords a beginner may well think: “Nobody mentioned this when I learned C major” . That is a perfectly understandable human reaction, but it is worth getting past it quickly and practising barre chords seriously.
There are easier methods and alternative fingerings. I show one example at the end of the video, where we place the middle finger on top of the index finger to make it easier to press the strings down. That genuinely helps, but it is not a habit worth developing too strongly and in the long term it should disappear from your technique. I have never used it myself, although I see plenty of videos in which players use two fingers for the barre. Another easier option, for example with a B-major chord, is to fret the G and C strings with the little and ring fingers. Then the index finger only needs to cover the E and A strings, so you do not need a full barre with the entire index finger. Which of the following two fingerings we choose for the 4-3-2-2 B-major chord depends partly on habit and partly on the song:
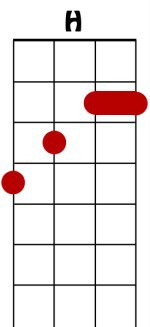 “Mini-barre”, where the index finger covers only two strings. |
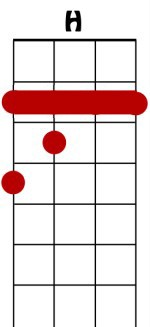 Full barre, where the index finger presses all four strings. |
There is actually no B major in Hafanana, but the mini-barre/full-barre idea can be applied to B minor. With B minor (4222), however, the mini-barre naturally has to cover three strings, which is almost a full barre anyway, so in this case switching between the two approaches does not make a huge difference. I use a full barre about 95% of the time and generally do not bother with alternatives.
You can try to avoid barre chords in various ways, but it is better to face them and accept that without barre technique we are one-armed giants trying to play a tiny instrument. Since I mentioned our beloved C major earlier, here is a slightly perverse piece of information: C major itself can be played as a barre chord in at least two different ways, depending on the length of the ukulele neck. And depending on the song, it can be useful or even necessary to switch between different C-major shapes. More about that in another post.
Some people think transposing always provides an escape route from barre chords. I have already written a post about transposing, so I will not go into all its advantages and disadvantages here. From the point of view of barre chords, however, it is worth mentioning that in a song containing many chords it is easy to transpose away a few barre chords only to find that the new key contains another chord you dislike just as much. Transposition is definitely worth learning, but it does not provide an escape from every barre chord, although moving a song up or down by a semitone can sometimes make it dramatically easier to play.
One more small point before the second video. This genuinely makes barre chords easier to strum; in fact it is not merely a convenience but an essential technique. I usually explain it by saying that we “pump” the chord – or the ukulele neck – and doing this saves an enormous amount of energy. Unfortunately I forgot to explain it separately in the video. It would have been easier to demonstrate than to describe, but never mind. Once we have positioned the barre chord, we press with full force only at the moment when we strum. As soon as we release the fingers by just a few millimetres, the strings naturally stop sounding. This is excellent for two reasons: first, this is how we can – and should – create rhythmic muting; second, our fingers do not cramp or tire nearly as quickly. Put another way, there is no point squeezing the strings continuously as if they had to ring all the time. Our fingers need to be firmly in place only when the strings themselves need to sound. This technique is so fundamental that it has to be learned, but at the same time it is so useful and natural that most people discover it almost automatically after a few weeks of practising barre chords. Watch the videos carefully and you will see that I also “pump” the chords, pressing and releasing the strings in time with the rhythm I am playing. That creates the rhythm and also gives my barre muscles tiny fractions of a second to rest. The important point is that when we release the pressure slightly, the hand remains in position: we do not take our fingers off the strings, we simply stop pressing them against the fingerboard. When the time comes, we squeeze the ukulele neck again between the fingers fretting the chord and the thumb supporting the neck from behind.
After all that frightening talk, here is the video showing how to play the accompaniment to Hafanana. I hope the explanation is clear. If anything is not, please ask or write to me!
You need to learn the following chords for the song: A#m = Bbm: 3111, F7: 2310, F# = Gb: 3121, C# = Db: 1114, G# = Ab: 5343. If anyone would also like to see all this embedded in the excellent lyrics,click here. (Unfortunately I am rather inconsistent about which enharmonic chord names I use, so I have written the equivalent names with equals signs because in the video I sometimes refer to one name and sometimes to the other.)
I continue to ask everyone who can tovisit my YouTube channeland subscribe using the red button below the video .
Do not forget to practise your chord changes withChordTime!